I receive my work email on an Android phone (Moto X – 2nd gen). My employer requires that the phone be encrypted in order to access email. This is enforced with EAS. It worked fine for months but yesterday, around noon, I no longer received email. Instead, I got a message that my account required a security setting update. When tapped OK, I was transferred to the “Encrypt phone” page, which was odd, because the phone was already encrypted. But the only option I had was “Encrypt phone”, so I tapped that. The phone rebooted, I saw the Android logo for a second or two and then the phone booted normally. No encryption took place – which actually made sense, as the phone was already encrypted. Yet, the “Encryption needed” message continued to pop up.
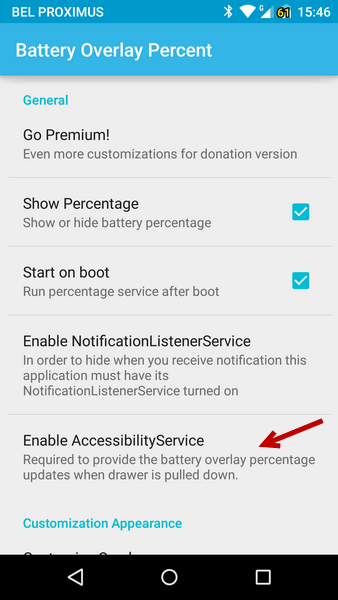
I contacted my HelpDesk and they confirmed that on the server side, everything looked fine. So it had to be an issue on the phone, but the Settings > Security > Encryption screen clearly indicated that the phone was Encrypted. So I decided to further digg into this. It took a while, but in the end I found out that the issue was caused by an app that at first sight, had nothing to do with the problem: Battery Overlay Percent. The app adds a battery percentage to the battery indicator in the Notification Bar. To be precise, the issue is not caused by the app itself, but by one of the (optional) settings: in order to show the percentage also when the drawer is pulled down, you need to enabled a setting in Accessibility:

I enabled that, but didn’t realize that that also impacts a Security setting: with this change, a PIN-code is no longer needed to unlock the phone. This is another requirement enforced by EAS. So this change caused the Exchange mail to stop working. Unfortunately, the error-message is incorrect: the problem is not that the phone is not encrypted, the problem is that the PIN is not asked from the lock screen or when powering on the phone. I assume the check is not done properly and whatever the missing element is, the error-message always show “Encryption required” and then redirects you to the Encryption screen… which is useless because the phone is already encrypted. (I would call this “sloppy programming”, but OK).
When I looked into all possible causes, I finally realized what was going wrong when I saw the following in Settings > Security > Screen Lock:
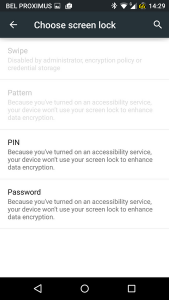
When I tapped the PIN setting, I got
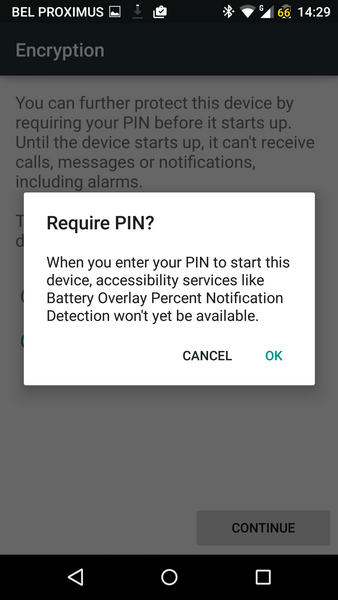
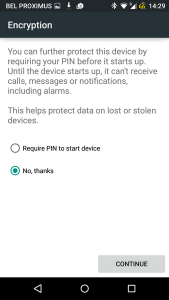 where I selected Require PIN to start device and then the issue became clear:

Turning off the Accessibility setting in the Battery Percentage Overlay app made my email come back!
In fact, I could have known this, as I got the following screen when activating the optional setting:
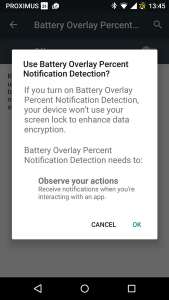 but to make the link between this and no longer receiving company email still is a stretch 🙂