Experimenting with Adobe AIR and jQuery – Part 2

The next step for my Top100-application was to make the same screen appear in an Adobe AIR application.

When you install the Adobe AIR extension for Dreamweaver, the Site menu in Dreamweaver has an additional option, called Air Application Settings. I selected that option and got the following screen:
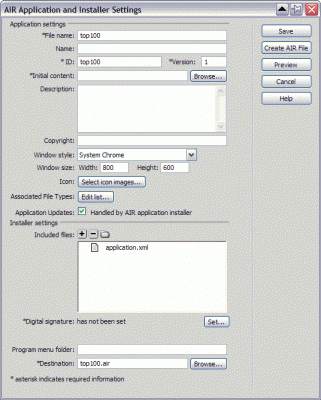
I entered 0.1 as Version, browsed for step1.html as Initial content, and clicked the Set button for Digital Signature. That gave me the following dialog box:
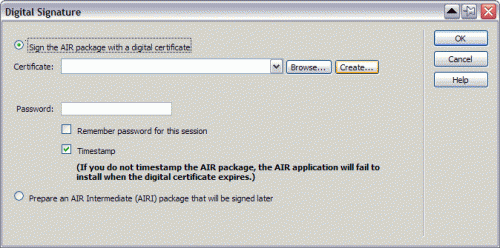
Every AIR package needs to have a digital certificate. Luckily, you can create one yourself, by clicking the Create button. (Go to the Adobe AIR Developer Center for more details on signing an AIR package)

Clicking the Create AIR file gave me an error message about timestamp issues, but I could dismiss that dialog box by clicking Disable (which disables the timestamp check, but I trust myself, so I don’t need that type of security). This finally resulted in a top100.air file.

Double-clicking that file in Windows Explorer resulted in the following warning dialog box:
which did not come as a surprise, because I signed the package myself. I clicked Install, and the application showed on my desktop:
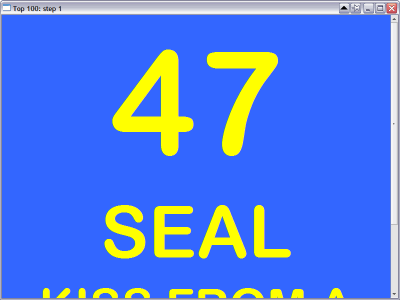
So it kinda worked… although I did not want the window border, the title, the buttons or the scrollbar.

So I needed some tweaking, which was easy enough in the Air Application Setting dialog box:

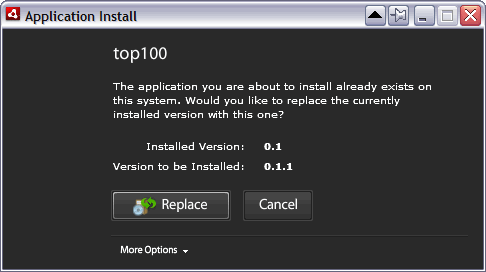
I selected Custom Chrome (opaque) for Window style and 1024×768 for Window size, changed Version to 0.1.1, created a new AIR file, double-clicked to install it, and clicked Replace to install the new version:
This finally resulted in what I wanted:

The next step was to have the application show the next song, when pressing a key. That’s for part 3 :-).


Experimenting with Adobe AIR and jQuery – Part 1

A few days ago, I was at a TOP-100 party, where the dj’s played their 100 most favorite songs. The venue had a few large screens, that showed the number, the artist and the title of each song.
It looked like this:

Whenever the next song started, the new number, artist and title would appear, using some standard PowerPoint-like animation (wipes, blinds, checkerboard, …).

Trying to build something myself seemed like a nice opportunity to experiment with Adobe AIR and jQuery.

  • Adobe AIR is a framework to build rich Internet applications that run on the desktop.
  • jQuery is a “fast, concise, JavaScript Library that simplifies how you traverse HTML documents, handle events, perform animations, and add Ajax interactions to your web pages”.

I am a heavy DreamWeaver user, so I had downloaded the Adobe AIR extension for Dreamweaver before. I had worked through the “Hello World” Getting Started demo successfully, but I hadn’t gone further with AIR yet, as I did not have a good experiment in mind. This TOP-100 app would change that.

The first step was to create an AIR application that would simply display the 3 elements on a screen: a number, an artist and a title.

The first step is to create a Site in DreamWeaver. I created the site “Top100” and a new file “step1.html” in it. I added the 3 elements and used some CSS to make it look like the example. This is the code:

<html xmlns="http://www.w3.org/1999/xhtml">
<head>
<meta http-equiv="Content-Type" content="text/html; charset=utf-8" />
<title>Top 100: step 1</title>
<style type="text/css">
body, p {
    font-family:"Arial Rounded MT Bold", "Arial", sans-serif;
    font-size: 24px;
    color: #FFFF00;
    background-color: #3366FF;
    margin: 0;
    padding: 0;
    text-align: center;
}
#number {
    font-size: 12em;
    margin-top: 5px;
    margin-bottom: 10px;
}
#artist {
    font-size: 6em;
    margin-top: 5px;
    margin-bottom: 5px;
}
#title {
    font-size: 4em;
    margin-top: 10px;
    margin-bottom: 5px;
}
</style>
</head>
<body>
<p>
<div id="number">47</div>
<div id="artist">SEAL</div>
<div id="title">KISS FROM A ROSE</div>
</p>
</body>
</html>

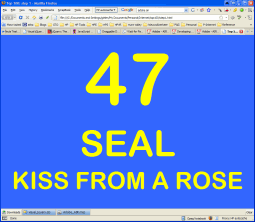
The result in a browser was:

which looked pretty much like I wanted it.

The next step was to make this screen show in an AIR application. I will explain how that went in part 2.


♦ Related files: step1.html